
Wooden Dresser Restoration Guide
Step 1: Assessment
Begin by carefully examining your wooden dresser. Look for any signs of damage such as cracks, scratches, or loose joints. Assess the condition of the existing finish to determine if it needs to be stripped off.
Step 2: Gather Supplies
Before you begin, make sure you have all the necessary supplies:
Sandpaper (coarse, medium, and fine grit)
Wood filler
Putty knife
Stain or paint (optional)
Varnish or sealant
Brushes or foam brushes
Screwdriver (if hardware needs to be removed)
Gloves and safety goggles
Step 3: Remove Hardware
If your dresser has any knobs, handles, or other hardware, use a screwdriver to carefully remove them. Set them aside in a safe place for later.
Step 4: Stripping or Sanding
Depending on the condition of the dresser, you may need to strip off the old finish using a chemical stripper or sandpaper. Follow the instructions on the stripper carefully if you choose this method. Alternatively, sanding can be effective for removing old finish layers and imperfections.
Step 5: Repairing
Inspect the dresser for any cracks, holes, or dents. Use wood filler to fill in these imperfections, smoothing it out with a putty knife. Allow the filler to dry completely before sanding it smooth.
Step 6: Sanding
Start sanding the dresser with coarse-grit sandpaper to remove any remaining finish and smooth out the surface. Gradually progress to finer grits until the wood feels smooth to the touch. Sand with the grain of the wood for the best results.
Step 7: Cleaning
After sanding, thoroughly clean the dresser to remove any dust and debris. A damp cloth followed by a dry cloth works well for this purpose.
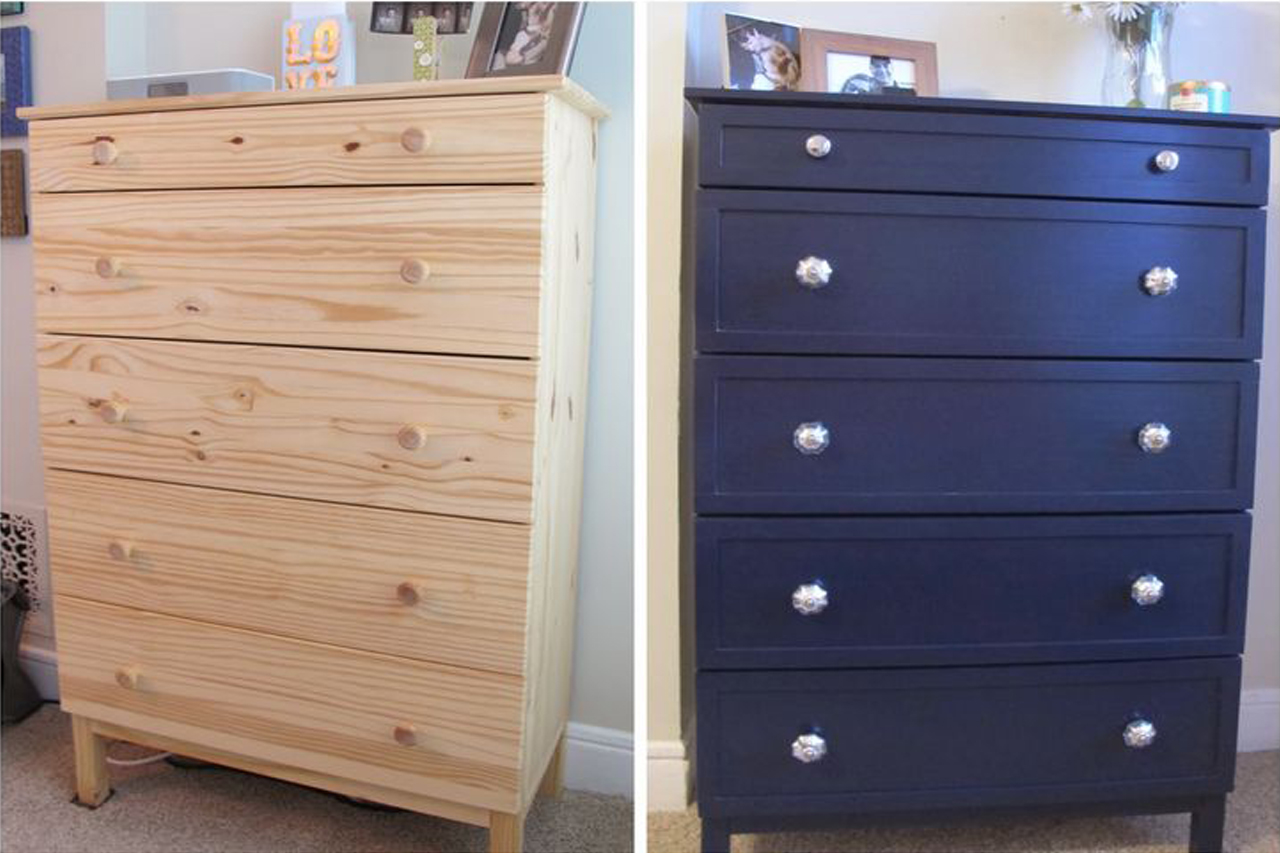
Step 8: Staining or Painting
Now it’s time to decide if you want to stain or paint your dresser. Stain enhances the natural beauty of the wood, while paint can give it a fresh new look. Apply the stain or paint evenly with a brush or foam brush, following the grain of the wood. Allow it to dry completely.
Step 9: Sealing
To protect the finish and ensure durability, apply a clear varnish or sealant. Apply thin, even coats, allowing each coat to dry completely before applying the next.
Step 10: Reattaching Hardware
Once the dresser is fully dry, reattach the hardware using a screwdriver.
Step 11: Final Touches
Stand back and admire your restored dresser! You may want to add decorative elements or accessories to personalize the piece and make it your own.
With these steps, you can breathe new life into an old wooden dresser and create a beautiful piece of furniture that you’ll be proud to display in your home. Happy DIY-ing!